QXlsx 프로젝트 설정하는 방법
- QXlsx를 적용하는 쉬운 방법은 다음과 같습니다.
- Windows에 적용하는 방법을 설명합니다.
- Linux 또는 Mac에 적용하는 방법도 비슷하므로 추가 요청이 있으면 도움을 요청할 것입니다.
설정 단계
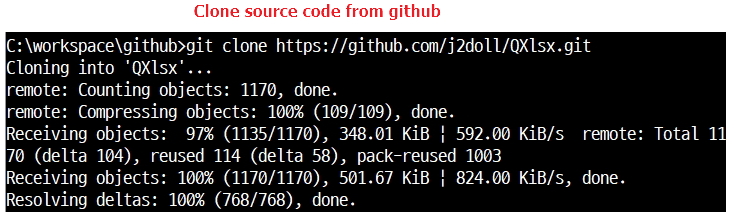
![]() github에서 소스 코드를 clone 합니다
github에서 소스 코드를 clone 합니다
git clone https://github.com/j2doll/QXlsx.git
![]() QtCreator를 실행합니다
QtCreator를 실행합니다
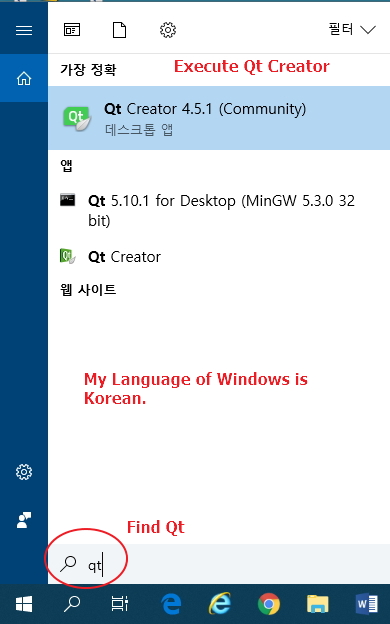
- QtCreator의 사용방법을 모르시면, Qt Company 사이트를 참조하세요. https://www.qt.io/qt-features-libraries-apis-tools-and-ide/
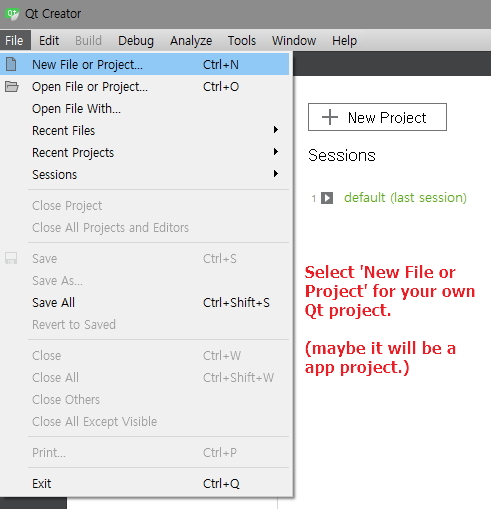
![]() 여러분의 Qt 프로젝트를 생성하세요
여러분의 Qt 프로젝트를 생성하세요
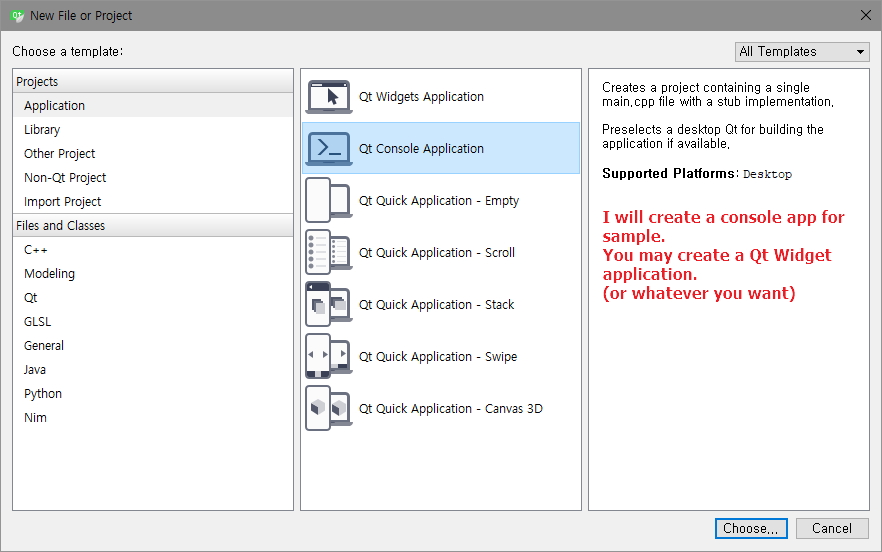
![]() 예제는 콘솔 어플리케이션입니다
예제는 콘솔 어플리케이션입니다
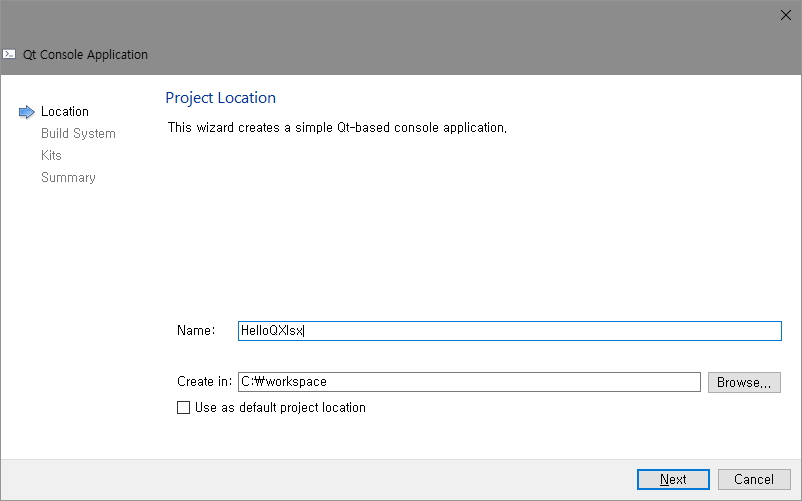
![]() 프로젝트 이름을 정하세요. 현재 프로젝트 이름은 HelloQXlsx 입니다.
프로젝트 이름을 정하세요. 현재 프로젝트 이름은 HelloQXlsx 입니다.
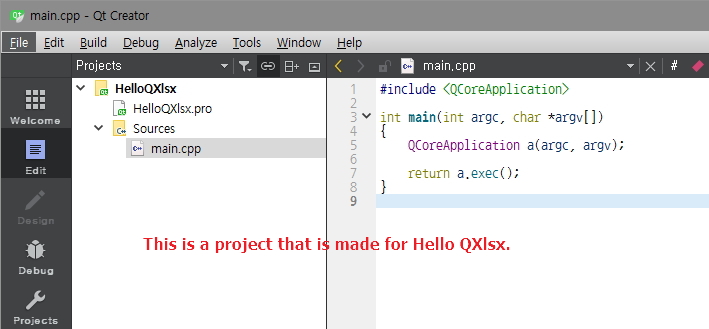
![]() HelloQXlsx 프로젝트가 생성되었습니다
HelloQXlsx 프로젝트가 생성되었습니다
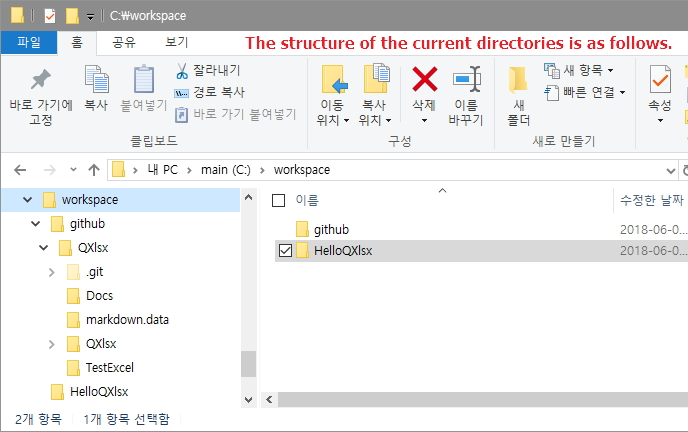
![]() 현재 경로
현재 경로
![]() QXlsx 코드를 여러분의 Qt 프로젝트에 복사하세요. (윈도우즈 탐색기로 복사하셔도 됩니다)
QXlsx 코드를 여러분의 Qt 프로젝트에 복사하세요. (윈도우즈 탐색기로 복사하셔도 됩니다)

xcopy c:\workspace\github\QXlsx\QXlsx c:\workspace\HelloQXlsx /s /e
![]() 현재 디렉토리 및 파일들
현재 디렉토리 및 파일들

![]() 여러분의 Qt 프로젝트(*.pro)에 QXlsx 코드를 추가하세요
여러분의 Qt 프로젝트(*.pro)에 QXlsx 코드를 추가하세요
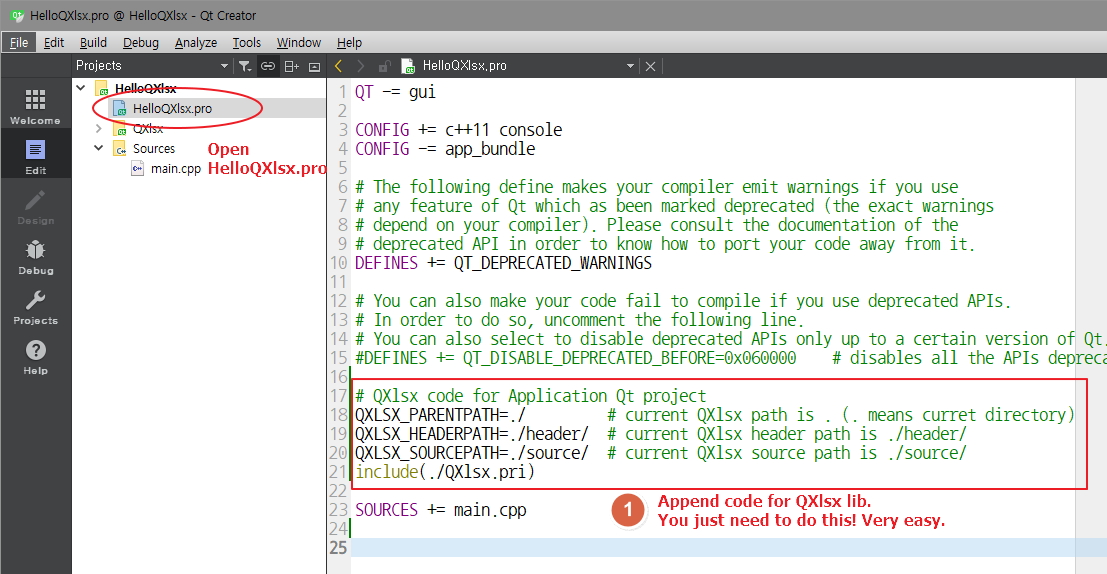
# QXlsx code for Application Qt project
QXLSX_PARENTPATH=./         # current QXlsx path is . (. means curret directory)
QXLSX_HEADERPATH=./header/  # current QXlsx header path is ./header/
QXLSX_SOURCEPATH=./source/  # current QXlsx source path is ./source/
include(./QXlsx.pri)
![]()
![]() 헤더 파일과 네임스페이스를 설정하세요. 그리고 예제를 위한 코드를 추가하세요
헤더 파일과 네임스페이스를 설정하세요. 그리고 예제를 위한 코드를 추가하세요

// main.cpp

#include <QCoreApplication>

#include "xlsxdocument.h"
#include "xlsxchartsheet.h"
#include "xlsxcellrange.h"
#include "xlsxchart.h"
#include "xlsxrichstring.h"
#include "xlsxworkbook.h"
using namespace QXlsx;

int main(int argc, char *argv[])
{
    QCoreApplication a(argc, argv);

    QXlsx::Document xlsx;
    xlsx.write("A1", "Hello Qt!"); // write "Hello Qt!" to cell(A,1). it's shared string.
    xlsx.saveAs("Test.xlsx"); // save the document as 'Test.xlsx'

    return 0;
    // return a.exec();
}
![]()
![]() 프로젝트를 빌드하고 실행하세요
프로젝트를 빌드하고 실행하세요

![]()
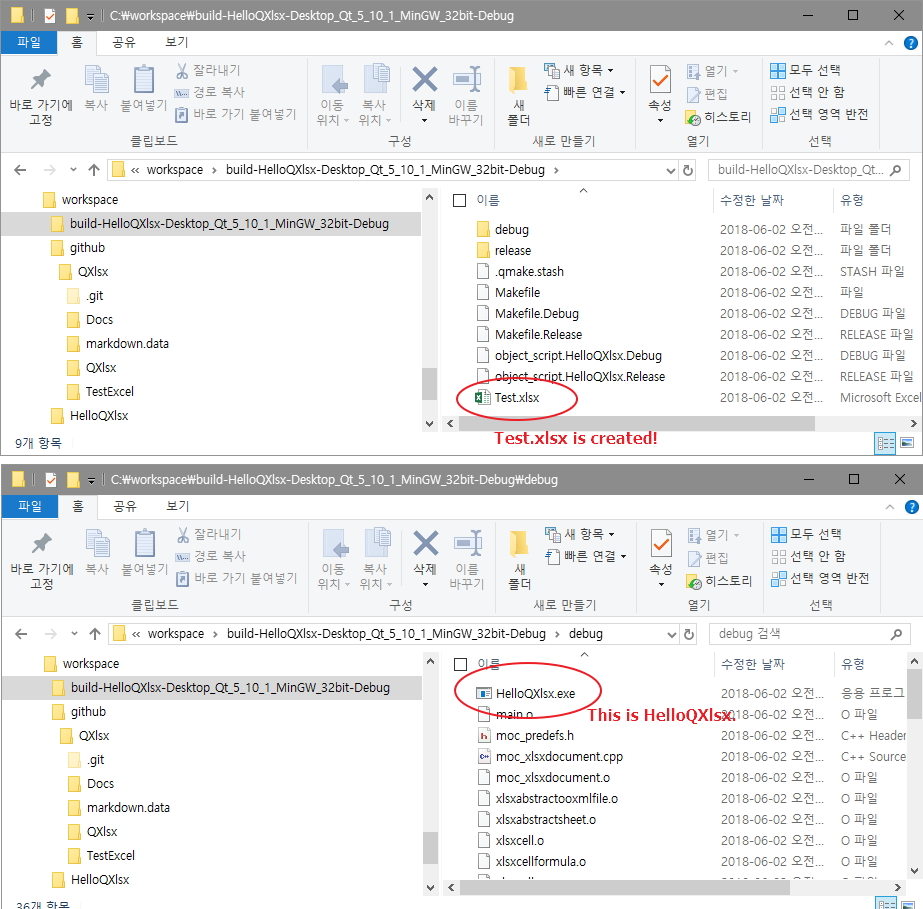
![]() 실행 파일(.exe)과 엑셀 파일(.xlsx) 파일이 생성되었습니다
실행 파일(.exe)과 엑셀 파일(.xlsx) 파일이 생성되었습니다